Getting Started
Thank you for your interest in the Arena Battle Starter Kit.
This website is made to provide clear documenation on all important features and aspects of the framework.
Contact
Email: coppragames@gmail.com
Installation Steps
- Make sure you have Unity 20181.2 Installed (Link to download)
- Open the project with Unity
- Install the following packages in Unity (Go to Window -> Package Manager)
1.TextMeshPro 1.2.3- In case you see compiler errors. Set the Scripting Runtime Version to 4.x Equivalent
- How to set the correct Scripting Runtime Version
1.Go to Edit -> Project Settings -> Player
2.Open Other Settings tab
3.You can find the setting under "Configuration"
4.Set it to .NET 4.x Equivalent
5.Enjoy!
* Remember - Keep Daily Backups!
Contents of the Asset
Introduction
When you import the asset into your project, you’ll get a 'Arena Battle Starter Kit' folder, and subfolders.
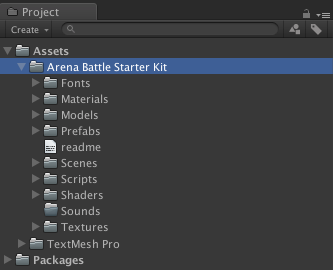
The main structure is made of the following folders :
- Fonts : the fonts used in the various GUI screens are stored there.
- Materials : a few materials used across scene.
- Models : all the models used throughout the scene.
- Prefabs : all the prefabs used throughout the scene.
- Scenes : this folder contains all the scenes included in this pack.
- Scripts : the “core” of the pack, and where most of its value resides. We’ll go over the details in a minute.
- Shaders : this folder contains all the shaders included in this pack.
- Sounds : all the sound files used throughout the pack. In current version, no sounds used.
- Textures : all the textures used throughout the pack.
UnitItem
How to create your own character?
Summary:This session explains how characters function in the pack and how to build your own.
Introduction
A typical playable character, with its collision and raycasts.
“UnitItem” in the ArenaBattleStarterKit is a term used to describe any kind of characters, whether they’re playable characters, or enemies, NPCs, etc. There are a few core classes that make these unititem work, and that you’ll need to get familiar with if you want to expand and create more character abilities for example.
In the meantime, this page aims at presenting the basic concepts and allowing you to quickly create your own character (player controlled or AI based). Note that all the information on this page (and on that whole documentation for that matter) only works for ArenaBattleStarterKit v1.0 or more.
Base concepts
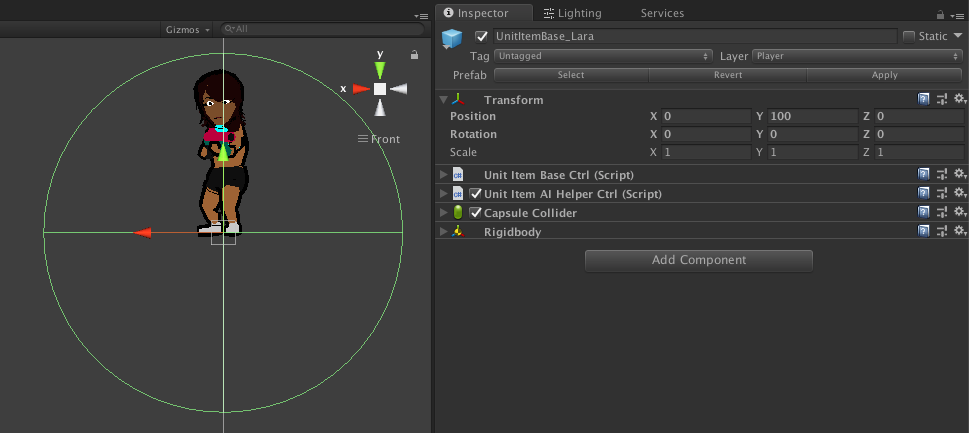
An example of the stack of components commonly found on Characters
This session goes into more details about the mandatory components of a Character, but here’s a brief rundown. An agent in the pack usually has these components :
UnitItemBaseCtrl : This is the central class that will link all the others. It doesn’t do much in itself, but really acts as a central point. That’s where you define if the player is an AI or player-controlled. It’s also the class that will control all character abilities at runtime.
UnitItemAIHelperCtrl : This class will control all AI behaviour of character.
Capsule Collider : the collider whose size is used to determine collision interaction with world.
Rigid Body : Adding a Rigidbody component to an object will put its motion under the control of Unity's physics engine.
How do I create a Character ?
Find the character one you like in the demos, and create yours from that. The process for that is quite simple :
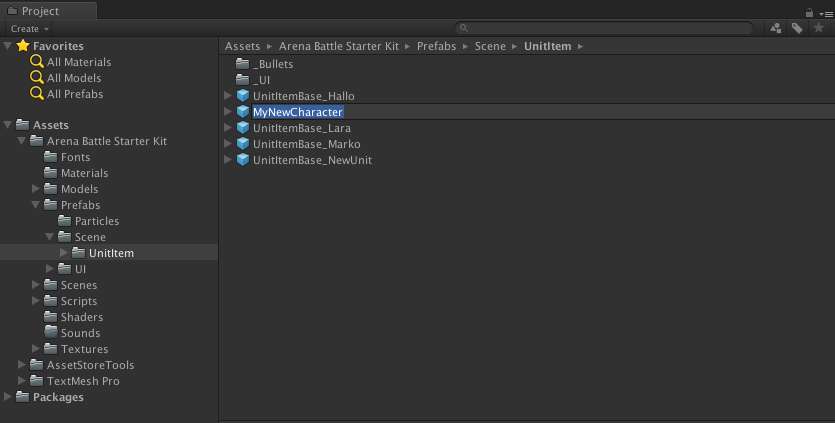
Copying an existing prefab
- Find a character you like.
- Locate its prefab (select the Character in Scene View, and in its inspector, at the very top right under the prefab’s name and tag there’s a Select button)
- Duplicate the prefab (cmd + D)
- Rename it to whatever you want your Character to be called
- Make the changes you want. Maybe you’ll just want to replace some settings, maybe you’ll want to change the model and animations. It’s up to you from there.
Artificial Intelligence
Summary:This session describes how the AI scripts of the ArenaBattleStarterKit work.
Introduction
Right now the engine includes a few basic AI scripts for your enemies (or friends). It’ll make them perform actions without the need for input from the player. To use them, you need to have a Character setup properly. Feel free to create your own AI scripts, it’s really easy and fun to do.
UnitItemAIHelperCtrl
Walk And Find Enemy
It’ll allow your AI character to walk. It will find nearest target and starts move to that target. If any walls or obstacles hits, then it automatically turn and continue to move to target. If it reaches target enemy on range, the AI will shoot at it using its current equipped weapon.
 void Update ()
 {
    // the update loop
 }

 public void FindTarget()
 {
    // here we define the find nearest enemy code
 }
Animations
Summary:This session describes how animations are used in ArenaBattleStarterKit.
Introduction
The ArenaBattleStarterKit includes a lot of demo characters, and they all come with a number of animations.
This page won’t cover how to create your animations. Unity has a lot of documentation on that, go check it out. It will however cover the specifics of the ArenaBattleStarterKit and how it’ll help you create nice animated characters.Animation Controllers
Marko character animationIn most cases you’ll need an Animation Controller to setup your animations. The asset includes a bunch of these, I’d recommend using the MarkoAnimatorController one as a starting point for yours as it includes all animation parameters, so you won’t have to enter them all again. You can simply duplicate it, and then drag your animations into it.
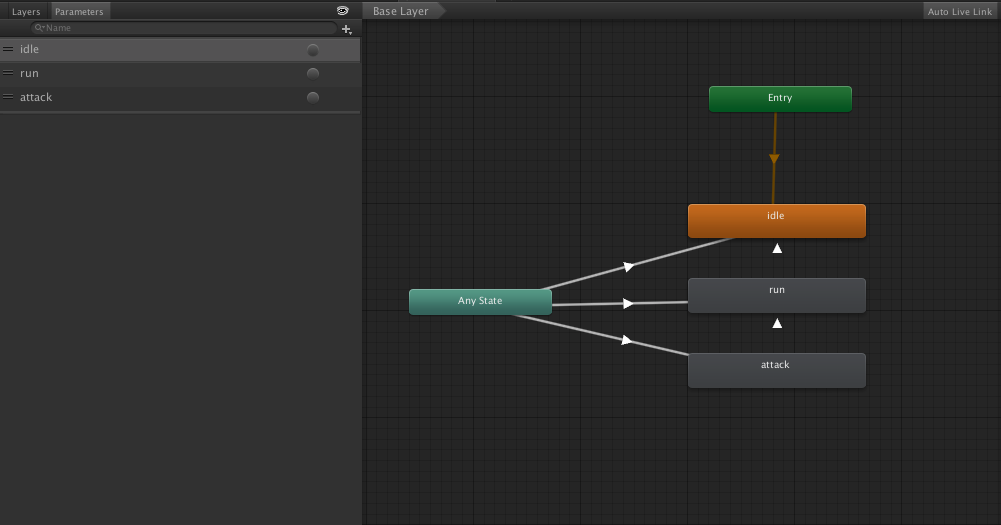
The Animation Controller is made of two big parts : on one side Animation Parameters that will get updated every frame by the Character and Character Abilities scripts to reflect the current state of the character, and on the other a state machine that will allow you to determine in which conditions each animation should be played and how to transition from one to the other.Animation and scripts
SetState : This method is called for change the animation state of character. You can find this function in UnitItemBaseCtrl script.
  public void SetState(Common.State state)
    {
        if (this.Animator == null)
            return;

        if (state == _currentState)
            return;

        if (state == Common.State.IDLE)
            this.Animator.SetTrigger("idle");
        else if (state == Common.State.RUN)
            this.Animator.SetTrigger("run");
        else if (state == Common.State.ATTACK)
            this.Animator.SetTrigger("attack");

        this._currentState = state;
    }
Controllers
Summary:This session covers the various controllers included in the ArenaBattleStarterKit and how to tweak them to your needs.
Introduction
The ArenaBattleStarterKit uses controllers as central reference points for a lot of classes and components. These controllers, always present in your scene.
There are a few of them, SceneController, UIController and CameraController. Usually you’ll want to place them on empty gameobjects. Their position in your scene doesn’t matter, they’re invisible anyway. It’s good practice to put them out of the way of your level so you don’t delete them by accident.
SceneController
The SceneController is a high level controller that is responsible for setting the target frame rate, and remembering UnitItem instances. It handles the item spawning at any position and particle spawning at any position. Easy to read and modifiable.
using System.Collections;
using System.Collections.Generic;
using UnityEngine;

public class SceneController : MonoBehaviour {
    public static SceneController instance;

    /* prefabs */
    public GameObject[] UnitItems;

    /* component refs */
    public GameObject Design;
    public GameObject UnitsContainer;
    public GameObject PlayerSpawnPosition;
    public StageItemCtrl Stage;
    public GameObject ParticlesContainer;

    /* public vars */
    [HideInInspector]
    public UnitItemBaseCtrl player;

    /* private vars */
    private Dictionary<int, UnitItemBaseCtrl> _unitItemInstances;

    void Awake () {
        instance = this;
        Application.targetFrameRate = 60;

        //Ignore collision between players
        Physics.IgnoreLayerCollision(11, 11); //Layer 11 - Player


        this.Design.SetActive(false);
        this._unitItemInstances = new Dictionary<int, UnitItemBaseCtrl>();
    }

    private void Start()
    {

    }

    public void InitStage()
    {
        this.Stage.Init();
        UIController.instance.ShowGameOverlayWindow();
    }

    public void SetPlayerUnit(UnitItemBaseCtrl unit)
    {
        this.player = unit;
        CameraController.instance.target = this.player.transform;
        unit.aiHelper.enabled = false;
    }

    public UnitItemBaseCtrl AddUnitItem(int itemIndex, int instanceId, float posX, float posZ, bool isOurTeam)
    {
        UnitItemBaseCtrl instance = Utils.CreateInstance(this.UnitItems[itemIndex], this.UnitsContainer, true).GetComponent<UnitItemBaseCtrl>();

        if (instanceId == -1)
        {
            instanceId = this._GetUnusedInstanceId();
        }

        instance.instanceId = instanceId;
        this._unitItemInstances.Add(instanceId, instance);

        instance.SetData(itemIndex, posX, posZ, isOurTeam);
        instance.SetState(Common.State.IDLE);

        return instance;
    }

    private int _GetUnusedInstanceId()
    {
        int instanceId = Random.Range(10000, 99999);
        if (this._unitItemInstances.ContainsKey(instanceId))
        {
            return _GetUnusedInstanceId();
        }
        return instanceId;
    }

    public GameObject PlayParticle(GameObject  particle, Vector3 position, float time)
    {
        GameObject instance = Utils.CreateInstance(particle, this.ParticlesContainer, true);
        instance.transform.position = position;
        Destroy(instance, 3);
        return instance;
    }
}
UIController
The UIController is responsible for showing Windows and other UI stuffs. Easy to read and modifiable.
using System.Collections;
using System.Collections.Generic;
using UnityEngine;

public class UIController : MonoBehaviour {
    public static UIController instance;

    /* prefabs */
    public GameOverlayWindowCtrl GameOverlayWindow;
    public LoadingWindowCtrl LoadingWindow;


    /* public vars */
    public GameObject Design;
    public GameObject WindowOverlay;

    void Awake () {
        instance = this;
        this.Design.SetActive(false);

        this.ShowLoadingWindow();
    }

    void Update () {

    }

    public void ShowWindow(ClosableWindowCtrl windowPrefab)
    {
        GameObject inst = Utils.CreateInstance(windowPrefab.gameObject, this.WindowOverlay, true);
        ClosableWindowCtrl win = inst.GetComponent<ClosableWindowCtrl>();

        win.Init();
    }

    public void CloseWindow(ClosableWindowCtrl window)
    {
        Destroy(window.gameObject);
    }


    public void ShowLoadingWindow()
    {
        this.ShowWindow(this.LoadingWindow);
    }

    public void ShowGameOverlayWindow()
    {
        this.ShowWindow(this.GameOverlayWindow);

    }
}
CameraController
The CameraController is responsible for moving camera along with player. Easy to read and modifiable.
using System.Collections;
using System.Collections.Generic;
using UnityEngine;

public class CameraController : MonoBehaviour {
    public static CameraController instance;

    /* prefabs */

    /* public vars */
    public GameObject mainCamera;
    public Transform target;
    public float smoothTime = 0.3F;
    public float distanceToTarget = -10.0f;

    /* private vars */
    private float _currentVelocity = 0;
    private float _startXPos;
    private float _startYPos;

    void Awake()
    {
        instance = this;

        this._startXPos = this.transform.position.x;
        this._startYPos = this.transform.position.y;
    }

    private void LateUpdate()
    {
        if (target == null)
            return;

        float targetZPos = target.transform.position.z + distanceToTarget;
        float currentZpos = Mathf.SmoothDamp(this.transform.position.z, targetZPos, ref _currentVelocity, smoothTime);

        this.transform.position = new Vector3(_startXPos, _startYPos, currentZpos);
    }
}
Input
Summary:This session explains how to setup input in your game.
Introduction
Input is at the heart of every game. The ArenaBattleStarterKit is no exception. It currently supports mobile controls (iOS, Android…), and mouse.
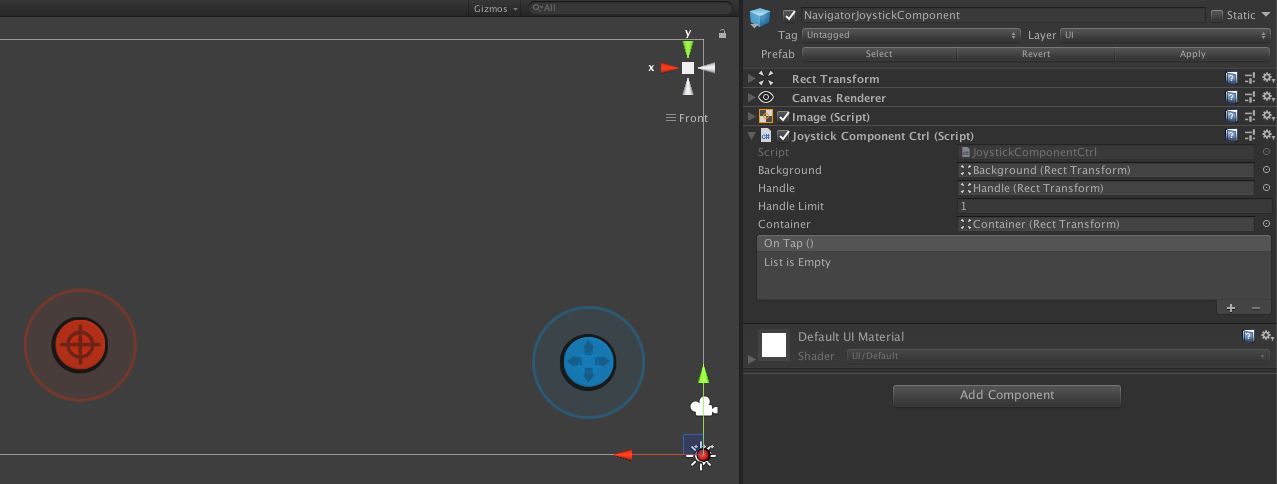
JoystickComponent
JoystickComponent are even easier to setup. Just add a JoystickComponentCtrl component to a Rect+CanvasGroup object, define which axis are enabled (you may want an horizontal only stick for example), the max range (how far the knob can move from its base).